Representing Volume

Screen Shot 2018-03-05 at 6.10.49 PM
My fourth graders are starting a new unit on fraction computation this week.  Last week, students finished up month long unit on volume and area.  After grading the tests, I started to reflect on a few different activities that seemed to help students understand volume a bit better.  One particular task will be highlighted in this post. I’m not going to lie, this task was quite challenging for kids, but I feel like the students were able to make some amazing math connections in the process.

So last week, I brought the students to the front of the room and we discussed area and volume.  Students provided examples of area and volume and referenced the city that they created earlier in the year.  Students then randomly came up to the room and drew out a slip of a paper.  The slips indicated a particular volume task. The tasks were all related to making a 3D shape that matched a certain dimension range.

Screen Shot 2018-03-05 at 5.53.15 PM

Screen Shot 2018-03-05 at 5.53.09 PMScreen Shot 2018-03-05 at 5.53.03 PM

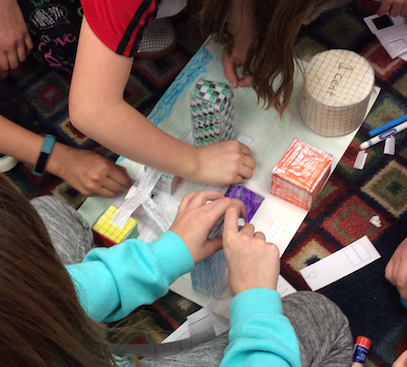
Students drew the small little sheets out of a cup.  It was exciting as students weren’t quite sure which sheet they were going to get.  Students were then given the direction sheet, where they were asked to create the net, tape/glue it together, place it on the sheet, and then take a picture and send it to their digital portfolio.

Screen Shot 2018-03-05 at 6.06.56 PM.png

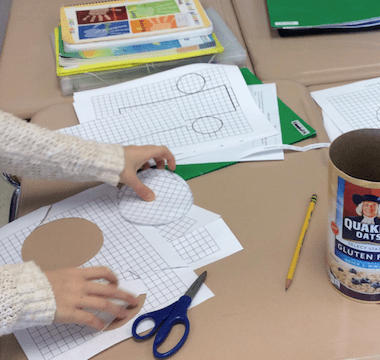
Students were then given the centimeter grid and were off to the races.  Some students had to take multiple grid sheets as they missed the required dimensions on many different attempts.  Eventually, most students calculate the volume that they needed and used a formula.  Students then used the formula to calculate the volume before creating the net.

Screen Shot 2018-03-05 at 6.01.41 PM.png
This took multiple attempts

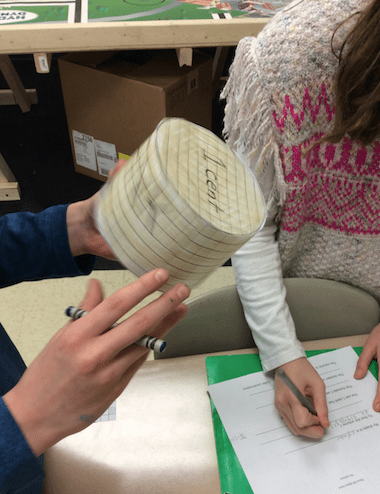
Students didn’t seem to have too many problems with rectangular prisms or cubes, but cylinders and cones were a bit more challenging.  Students were able to create the base fairly quickly.  The curved surface was an issue for some.  Many students had trouble creating a large enough curved surface to match the cones and cylinders.  One student mentioned that the curved surface needed to be around 3 1/4 of the length of the circumference.  I enjoyed hearing that as a couple students had a conversation on how to make their shape fit a required dimension. That’s an #eduwin in my book.  Students then attached their constructed structures to the direction sheet.

Students then put the different structures on a map and created a small city.  I’m hoping at some point the students will be able to create a short stop-motion-video using the volume structures.  It might fit in perfectly with our rate/ratio unit that will be coming up after PARCC testing.

Screen Shot 2018-03-05 at 6.08.17 PM

Roller Coasters and Math

Screen Shot 2015-11-29 at 7.55.48 AM

One goal this year is to have my classes complete more interdiciplinary projects. These projects move beyond district-adopted texts and often involve multiple subjects and student groups.  I find value in having these projects as students often need to work in teams and apply their mathematical thinking in different situations.

Back in September I came across the tag #paperrollercoaster.  After completing a quick search I came across multiple pages where teachers had students create paper roller coasters and answer questions.  The questions were often related to math/Science objectives.  I thought this had potential so I finalized a decision and ordered a set from here.  My thinking was that if one worked out well I might order more.

Screen Shot 2015-11-29 at 8.30.29 AM

The materials arrive around a week after I placed the order.  I decided to use the project with a third grade class.  After a brief explanation, students were placed in three groups.

rollercoaster-01

One group drew out and created an outline for the base on a piece of cardboard.  The group was asked to create six square bases where students would be placing support columns. The second group scored, cut out and attached the base columns together to be placed on the outline of the first group.  The third group was in charge of creating the support beams. Students scored, cut out and opened up both ends of the beams so they could be added to the columns.

All groups had approximately 20 minute to work in their group.  They were supplied with tape, scissors and directions.  Afterwards, the class met in the front of the room and we started to build the base for the roller coaster.  During that time the class started to discuss some of the math vocabulary we’ll be using as the building continues. Most of the terms will be coming from the geometry and measurement math strands.  The terms area, surface area, volume, length, formulas, speed and height were all discussed before the students left for their next class.  I appreciate the multiple math entry points available through the use of this project.  As the project progresses I’m planning to add activities/sheets that we use.  In the meantime, feel free to check out a few lessons here.


%d bloggers like this: